Troubleshooting a custom web UI Asterisk dialer is one of the most misunderstood challenges in contact center operations. Unlike off-the-shelf PBX systems, a bespoke interface layered over VICIdial or a standalone Asterisk backend does not fail in predictable ways – issues span the web server, database engine, API endpoints, and user permission model simultaneously, often without surfacing a clear error message.
This guide takes a structured, layer-by-layer approach to diagnosing and resolving the most frequent failure points. Whether your team deployed a React-based supervisor dashboard, a Tailwind-styled agent panel, or a lightweight PHP admin interface on Ubuntu or AlmaLinux, the underlying architecture is consistent: browser requests reach a web server, PHP scripts talk to Asterisk via AMI or AGI, and all persistent data lives in MariaDB. Break any link in that chain and the UI goes dark – or worse, fails without explanation.
How a Custom Web UI Connects to an Asterisk Dialer
Before touching a single config file, you need a clear picture of the stack. A custom web UI deployed over VICIdial or standalone Asterisk is not a monolithic application – it is a collection of loosely coupled layers, and each layer has its own failure modes.
- Browser (Agent / Admin / Supervisor) – renders your custom HTML, CSS, and JavaScript interface.
- Web Server (Apache or NGINX on Ubuntu / AlmaLinux) – serves PHP files, handles HTTP routing, and enforces file permissions.
- PHP Application Layer – your custom scripts, plus core VICIdial PHP files (admin.php, vicidial.php, non_agent_api.php, and others).
- Asterisk Manager Interfac e(AMI) – a TCP socket over port 5038 allowing PHP scripts to originate calls, monitor channels, and receive real-time events.
- MariaDB / MySQL – stores all dialer states: leads, campaigns, dispositions, user accounts, call logs, and system configuration.
A fault anywhere in this stack will appear in the browser as a timeout, a blank page, a PHP error, or a misleading “Access Denied” message. Systematic troubleshooting means ruling out each layer in sequence, rather than jumping straight into Asterisk dialplan files or Asterisk Manager Interface logs.
VICIdial API Architecture: Agent API vs Non-Agent API
A significant proportion of custom UI problems originate in incorrect API usage, not in Asterisk configuration. VICIdial exposes two independent API surfaces. Confusing them – or using the wrong credentials with either – is an extremely common source of integration errors in custom PBX web interfaces.
| API Type | Default Endpoint | Primary Use Case |
|---|---|---|
| Agent API | /agc/api.php | Controls an active agent session – pause, transfer, hangup, set disposition. |
| Non-Agent API | /vicidial/non_agent_api.php | System-level operations: lead injection, CRM sync, campaign statistics, and callback management. |
The Non-Agent API is the more frequently integrated endpoint in custom web UIs. It accepts standard HTTP GET or POST requests and does not require an active agent session. If your dashboard pulls real-time campaign statistics, pushes leads from an external CRM, or triggers automated callbacks, every one of those calls routes through non_agent_api.php.
The Agent API acts against a live session identified by a session token. Calling Agent API functions when no agent is logged in will always return an authentication failure – and this is frequently misread as a server configuration error rather than a session state error.
Quick Diagnostic: Testing the Non-Agent API Endpoint
Run a minimal test from the server’s own terminal to isolate whether the issue is in your application code or in the server environment:
curl "http://127.0.0.1/vicidial/non_agent_api.php?source=test&user=admin&pass=yourpass&function=version"A correct response returns a version string. Anything else – a 403, a blank body, or a PHP parse error – narrows the problem to credentials, file permissions, or a stopped web service. Test from an external IP next to determine whether a firewall rule is the additional variable.
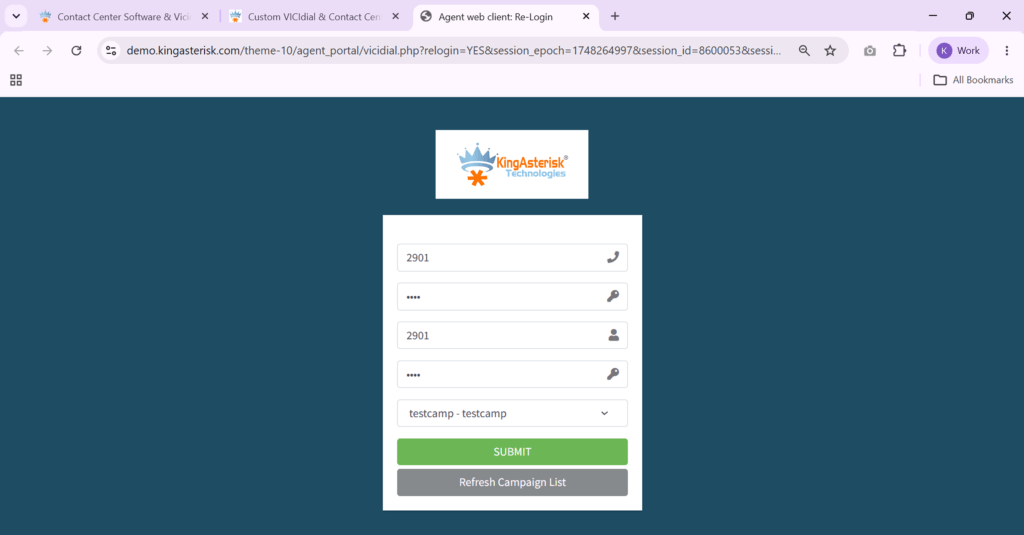
Step 1 – Diagnosing Web Server and Login Page Failures
Login failures and blank admin pages are the most visible symptom reported by end users. When agents or supervisors cannot reach the admin dashboard, work through these checks before investigating anything else.
Confirm the Web Server Service is Running
systemctl status httpd
# AlmaLinux / CentOS systemctl status apache2
 # Ubuntu
If the service is inactive or failed, start it and immediately inspect the error log:
tail -n 50 /var/log/httpd/error_log
# AlmaLinux tail -n 50 /var/log/apache2/error.log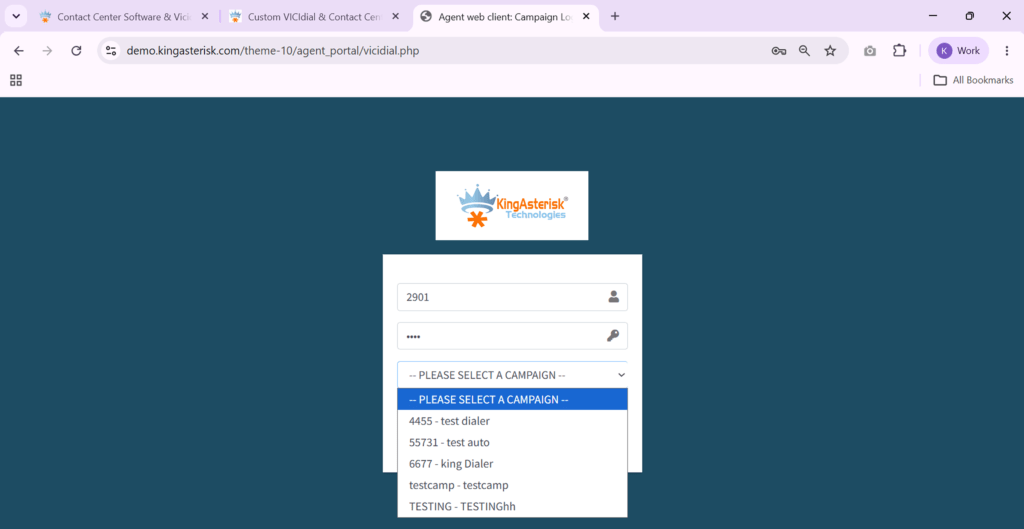
# UbuntuVerify the Custom Theme Path Exists
KingAsterisk custom themes deploy to a separate directory. The original VICIdial admin lives at /vicidial/admin.php. A custom theme admin panel typically lives at a path such as /dialer/admin.php or /theme-5/dialer/admin.php. A 404 on the login URL almost always means the document root is pointing to the wrong directory, or the custom folder was not transferred to the correct server location.
ls -la /var/www/html/dialer/Correct File Ownership and Permissions
# AlmaLinux chown -R apache:apache /var/www/html/dialer/ chmod -R 755 /var/www/html/dialer/
# Ubuntu chown -R www-data:www-data /var/www/html/dialer/Incorrect ownership is the single most common cause of blank white pages or silent 500 errors after a fresh theme deployment. PHP cannot read files it does not own when running under the web server user context.
Step 2 – Resolving Database Connection Errors
A database connection failure in a custom web UI Asterisk dialer typically produces either a PHP fatal error or a custom-coded “Could not connect” message. Asterisk’s interface – campaigns, user accounts, lead data, live statistics, and system settings – is fetched live from MariaDB on every page load. No database connection means no functional UI.
Confirm MariaDB is Running
systemctl status mariadb systemctl start mariadb
# if the service is stoppedTest the VICIdial Database Credentials Directly
VICIdial stores database credentials in /etc/astguiclient.conf. Locate the VARDB_user and VARDB_pass entries, then test the connection from the command line:
mysql -u vicidial -p -h 127.0.0.1 asteriskAn “Access Denied” error means the database user’s password has changed, or the user’s host grant no longer includes 127.0.0.1. Re-establish the grant:
GRANT ALL ON asterisk.* TO 'vicidial'@'127.0.0.1' IDENTIFIED BY 'yourpassword'; FLUSH PRIVILEGES;
2.3 Check Port 3306 Accessibility
ss -tlnp | grep 3306On multi-server deployments where the database runs on a dedicated host, confirm the firewall on the DB server accepts inbound connections from the web server’s IP on port 3306. Firewall misconfiguration between the web tier and database tier is the second most common cause of database errors in distributed contact center environments.
Step 3 – Fixing API Endpoint and Authentication Failures
When a CRM integration, lead upload form, or reporting widget stops returning data, the failure is almost always one of four things: the wrong endpoint is being called, credentials are invalid or expired, a required function parameter is missing, or a PHP error inside the API script is producing an unexpected response body.
Test the Endpoint from Two Locations
Run the curl test shown in the architecture section from both the server itself (127.0.0.1) and from the external client IP. If localhost succeeds but the external request fails, the issue is a firewall rule or an Apache access control directive – not the PHP application logic.
Verify the API User Account Permissions
Every Non-Agent API request must include a valid user and pass parameter. The VICIdial user account making API calls requires specific flags. Navigate to Admin – Users – [your API service account] and confirm:
- API Access is set to Y.
- The calling server’s IP is included in the API user’s allowed IP list (if IP restriction is active).
- User Level is set to 8 or 9 – some Non-Agent API functions require elevated levels to execute.
Enable API Verbose Logging Temporarily
Set VARAPI_verbose to 3 in /etc/astguiclient.conf, then tail the log file during your next API call:
tail -f /var/log/astguiclient/AGILOG20*.txt | grep -i api Verbose mode exposes the exact function call received, the resolved parameters, and the logic path taken by the server – considerably more diagnostic than PHP error logs alone.
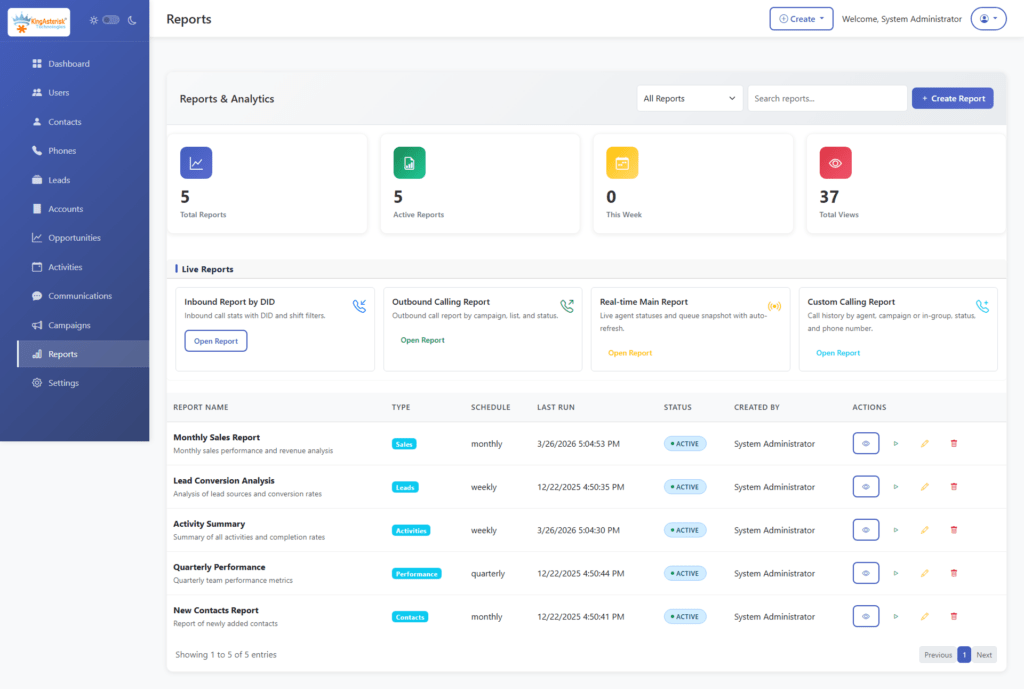
Step 4 – Correcting User Permissions and Report Access
A common class of custom admin panel issues involves users seeing too much – or too little – of the reporting interface. VICIdial’s permission system is granular and powerful, but several settings interact in non-obvious ways.
Create a Dedicated User Group for Report Viewers
Manage report access through User Groups, not individual user settings. In Admin – User Groups, create a group (e.g. REPORT_VIEWERS). Inside that group’s configuration, open the Allowed Reports section and select only the reports this group should access. For a typical “supervisor view” scenario, selecting Agent Time Detail and deselecting everything else gives precise, auditable access control.
Apply the Correct User Level and Admin Flags
| Setting | Recommended Value for Report-Only Users |
|---|---|
| User Level | 7 or 8 (needed for report interface access) |
| View Reports | 1 (enabled) |
| Modify Users | 0 (disabled) |
| Modify Campaigns | 0 (disabled) |
| Load Leads | 0 (disabled) |
| Delete Users | 0 (disabled) |
This combination grants sufficient privilege to reach the reporting interface without exposing campaign administration, lead management, or system configuration. User levels 7 and 8 allow reporting; level 9 exposes full administrative functions.
Restrict Report Scope by User Group
If supervisors should only see data for their own team – not other departments – configure the Allowed User Groups setting within REPORT_VIEWERS. This restricts which other User Groups’ data this group can query, providing data segmentation without requiring separate VICIdial Asterisk installations.
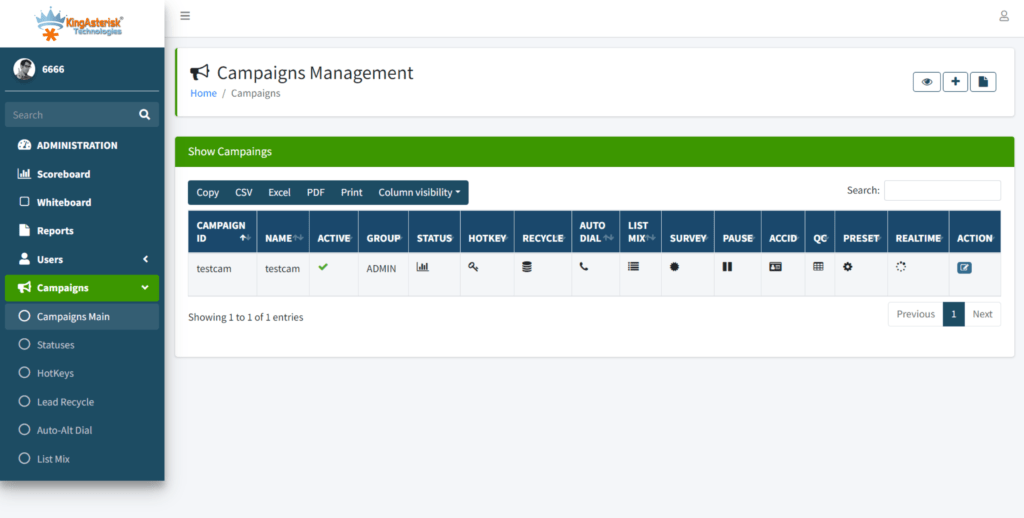
Step 5 – Custom Theme Path Conflicts and Deployment Errors
Custom VICIdial themes use a separate directory tree from the core VICIdial codebase. This design is intentional: it keeps theme files isolated from SVN-managed core files, so a VICIdial update does not overwrite your UI customizations. The trade-off is that path-related errors are unique to your specific deployment.
The Two Parallel Path Systems
| Interface | Default Path |
|---|---|
| Original VICIdial Admin | /vicidial/admin.php |
| KingAsterisk Custom Admin | /dialer/admin.php or /theme-N/dialer/admin.php |
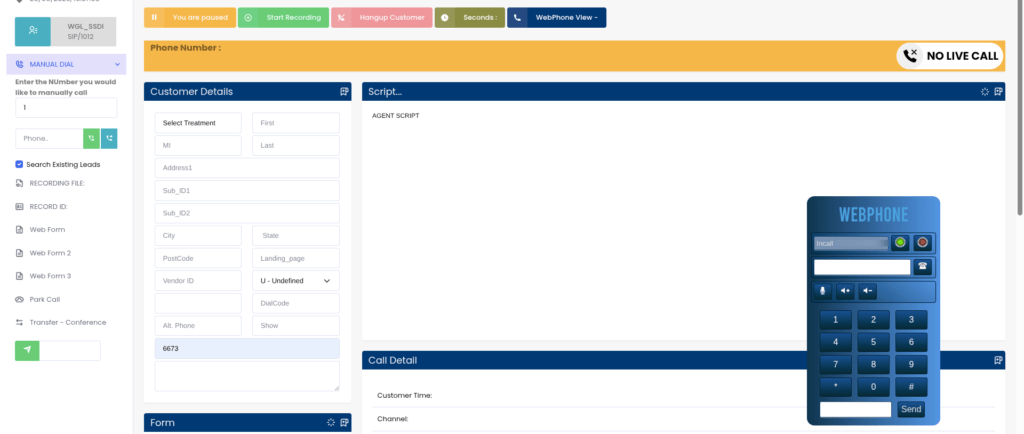
| Original Agent Screen | /vicidial/vicidial.php |
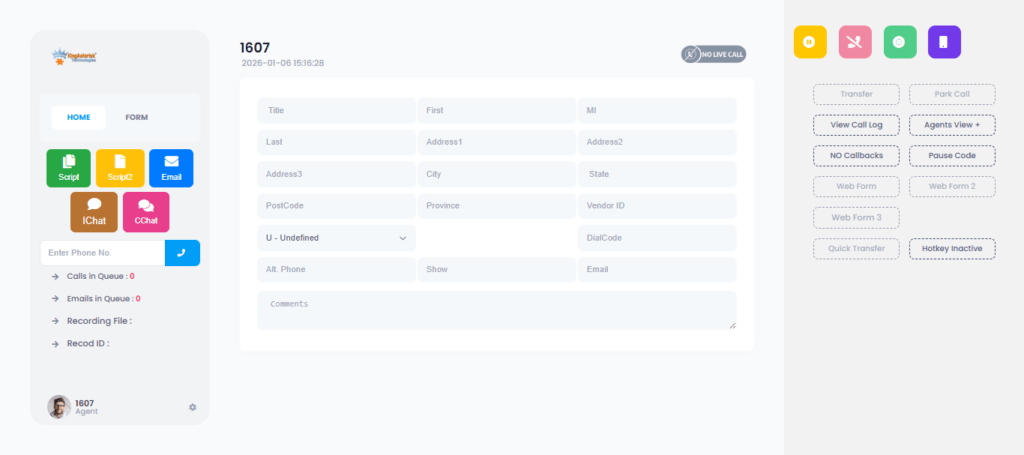
| Custom Agent Screen | /agent/agent.php (configurable per deployment) |
If your custom panel loads the login page but core VICIdial functions – campaign management, live monitoring, lead lists – fail to render correctly after authentication, verify that the theme’s internal links and backend API calls still point to the correct VICIdial backend paths.
Customization changes the presentation layer; the backend endpoints remain at their original locations.
Version Alignment: ViciBox and SVN Revision
Custom themes are built and tested against a specific ViciBox version and VICIdial SVN revision. Installing a theme built for SVN 3803 on a system running SVN 3900+ can produce PHP function mismatches or missing database columns. Before any new theme deployment or custom development engagement, document these two values:
- ViciBox ISO version – visible at the AlmaLinux login prompt or in /etc/vicibox-version.
- VICIdial SVN revision – found via: svn info /usr/src/vicidial
NOTE: AlmaLinux with a dedicated IP is the required server environment for new custom theme installations from KingAsterisk. Ubuntu is supported for existing deployments, but service names and file ownership differ—adjust systemctl commands and chown targets accordingly.
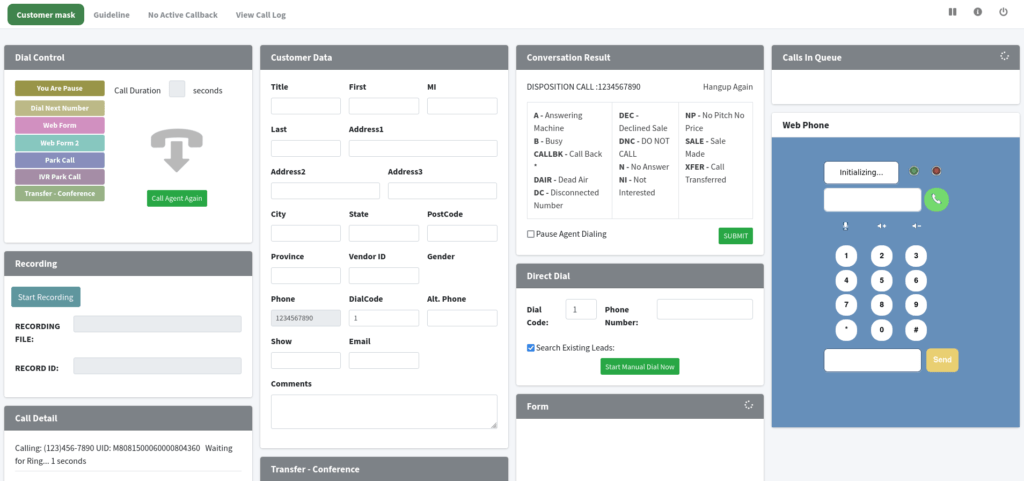
Real-World Scenario: 80-Agent Outbound Contact Center
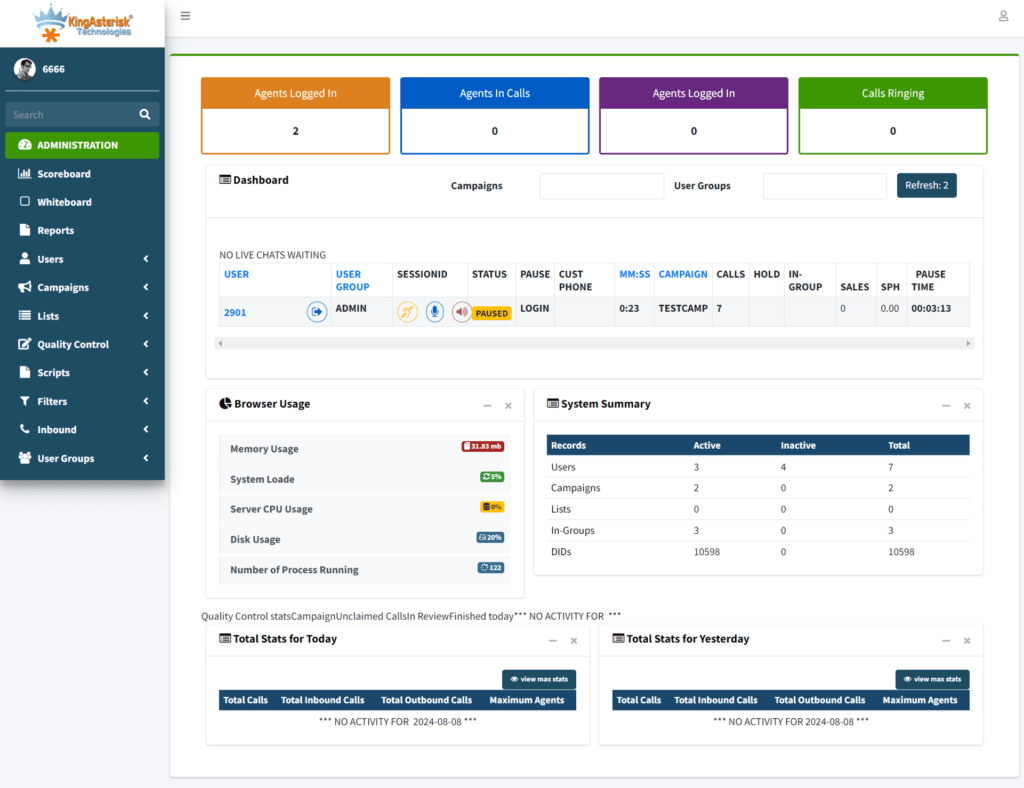
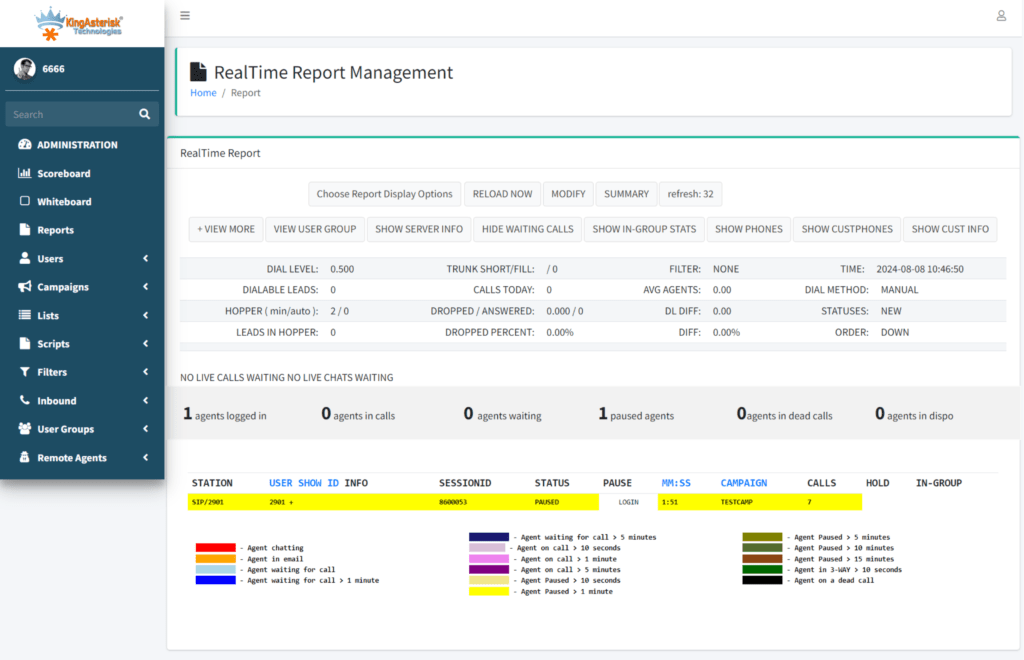
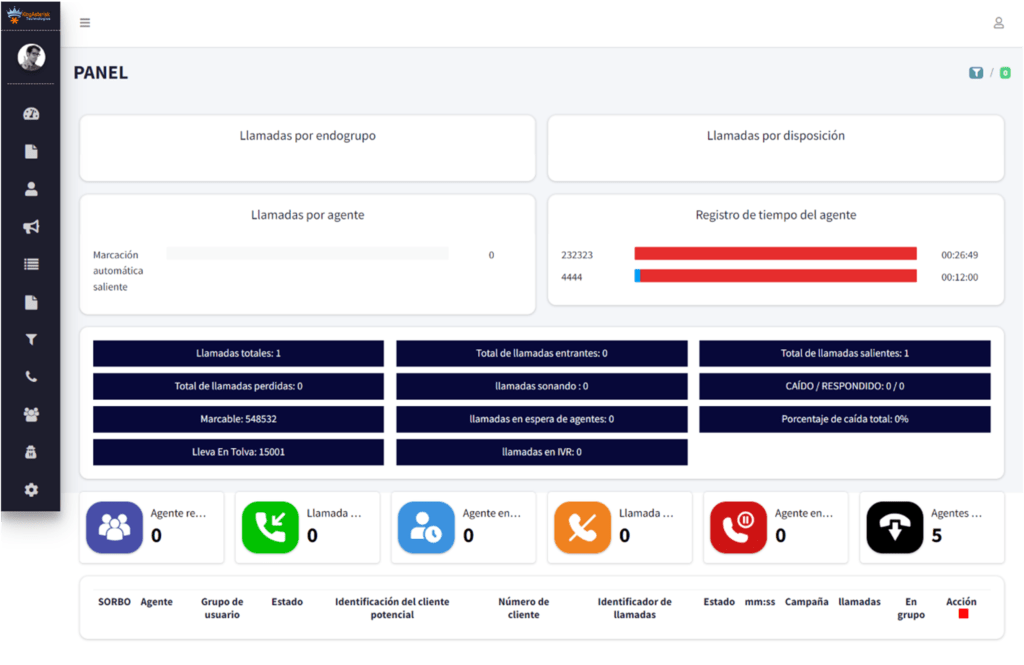
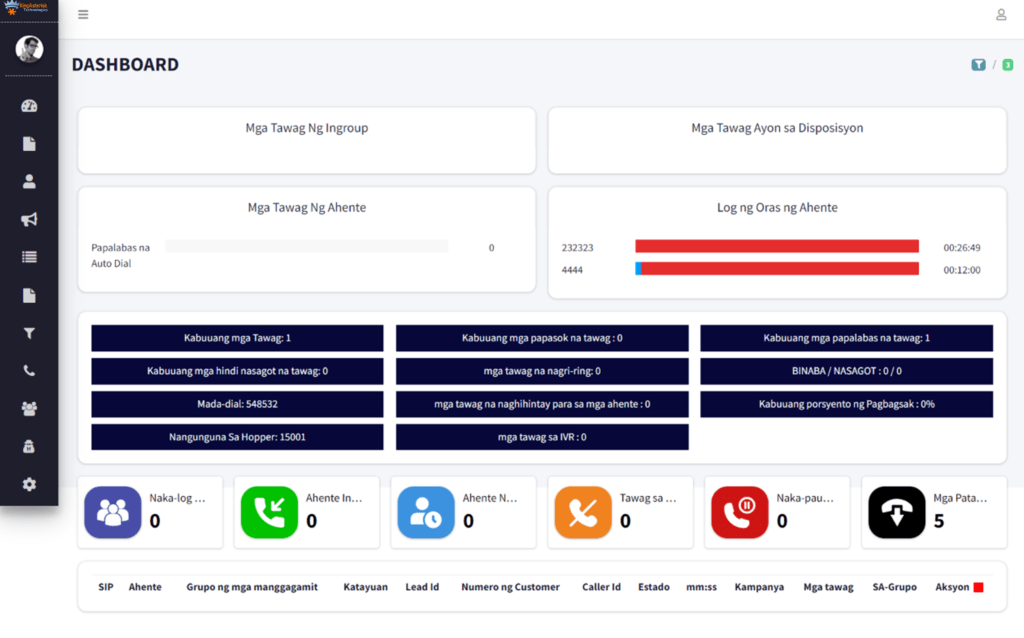
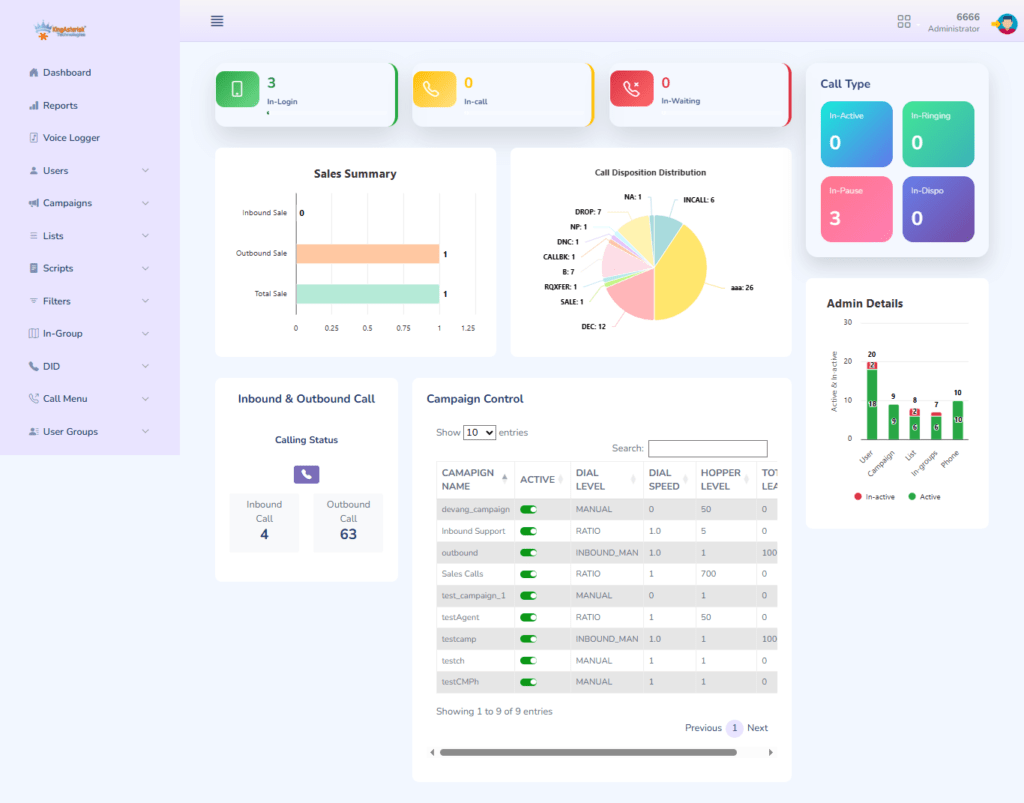
A US-based outbound lead generation operation running 80 agents on a KingAsterisk custom Asterisk theme reported that the supervisor dashboard was showing blank campaign statistics at unpredictable intervals. Agents could log in and dial normally, but the real-time reporting panel returned empty tables with no visible error.
Working through the five-step framework above, the root cause was identified at Step 3: the custom dashboard was calling the Non-Agent API using a service account that had API Access set to N – a flag accidentally toggled during a routine user audit the previous week. The API was silently returning an authentication failure, and the custom dashboard’s JavaScript interpreted the empty response as “no data available” rather than surfacing an error state.
The resolution took under 20 minutes: re-enable API Access on the service account, verify via a direct curl test, and confirm data returned to the dashboard without any server restart. The key lesson: always test your API service account independently before debugging dashboard code or investigating Asterisk internals.
Frequently Asked Questions
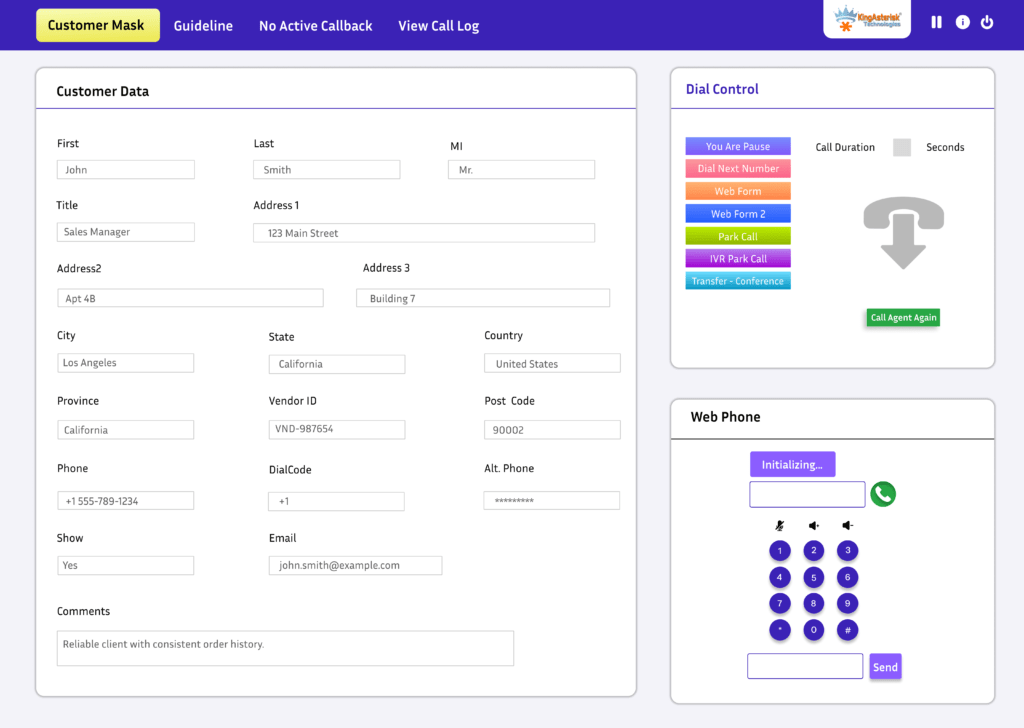
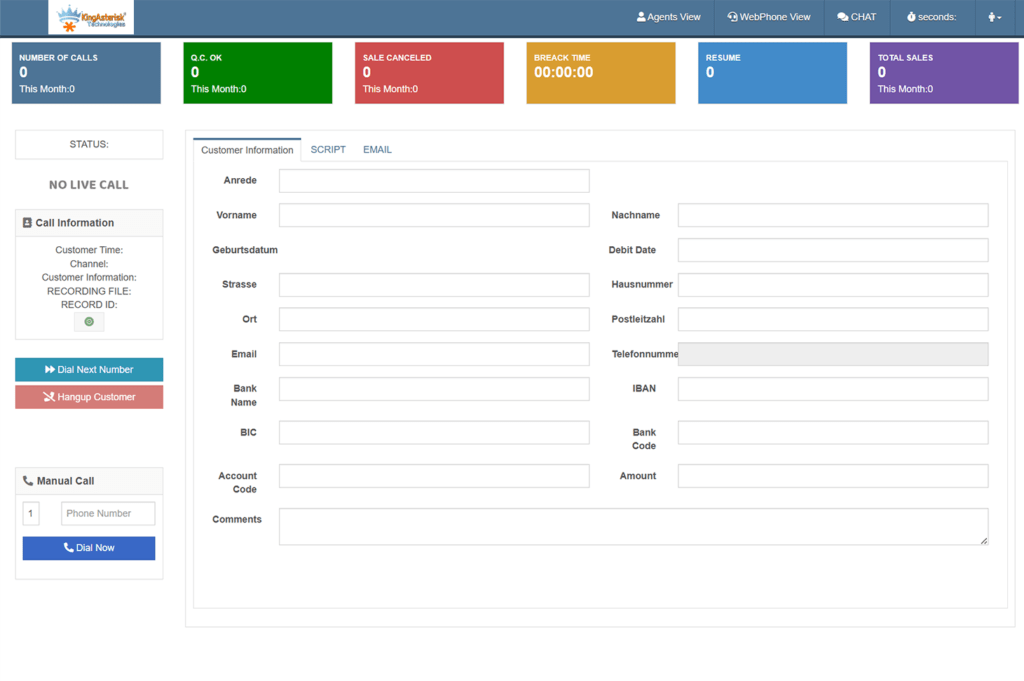
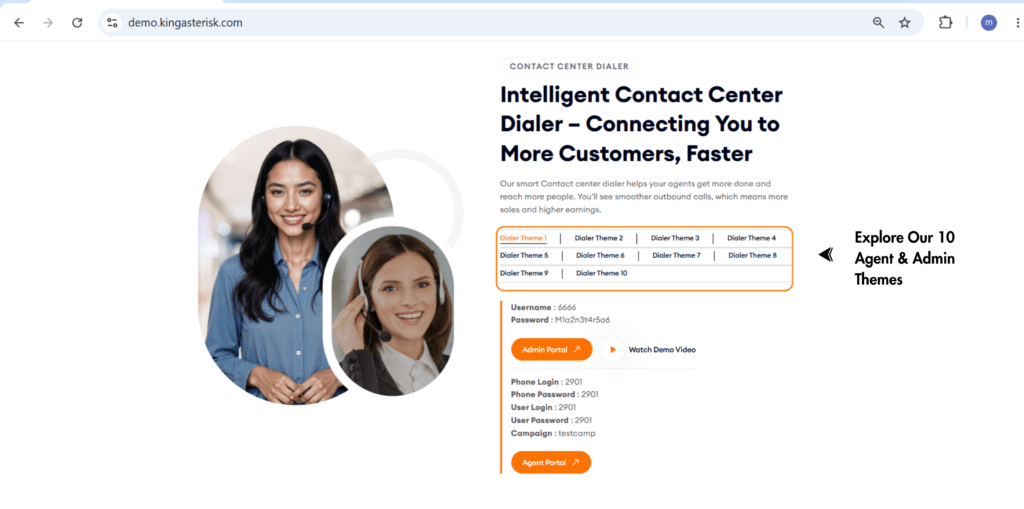
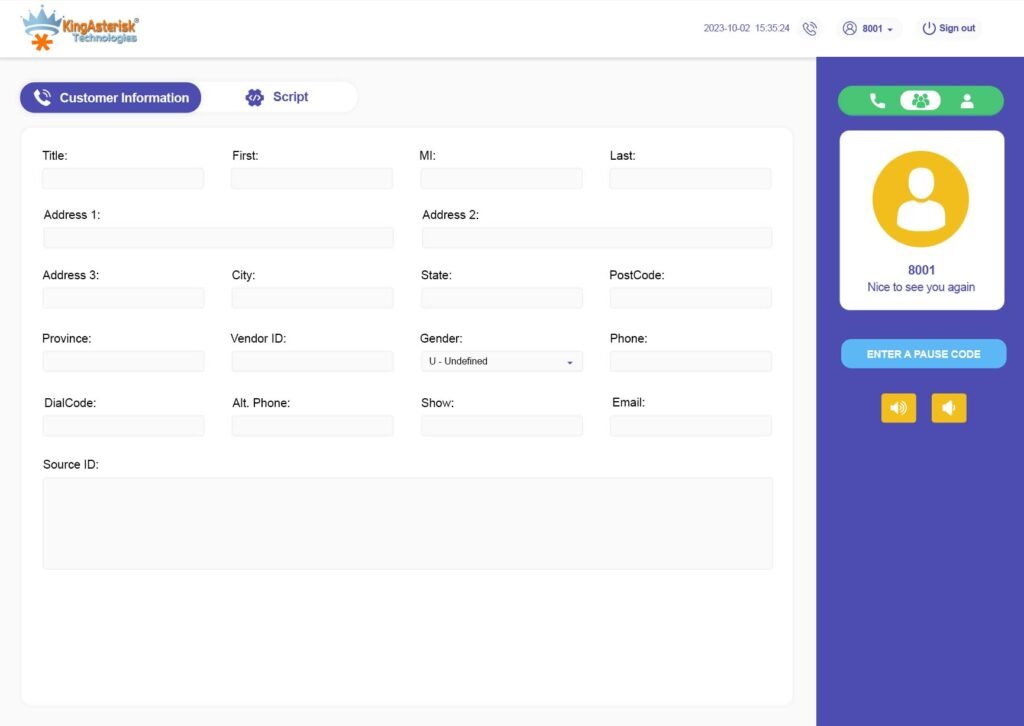
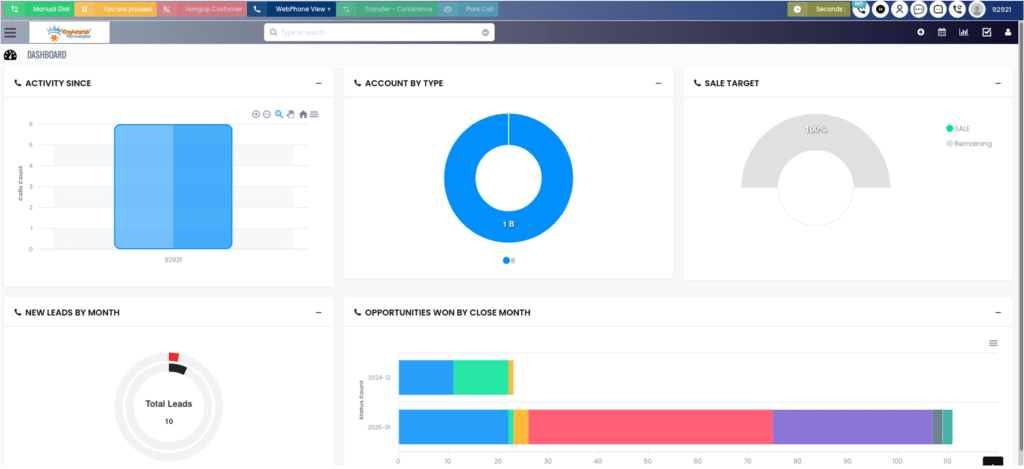
A custom web UI Asterisk dialer is a purpose-built browser interface layered over a VICIdial or Asterisk backend. Where the default VICIdial interface is functional but dated, custom UIs typically feature modernized layouts built with React or Tailwind CSS, role-specific dashboards, branded styling, and simplified navigation. The underlying Asterisk engine, database schema, and API structure remain identical – only the presentation layer changes.
Yes. Ubuntu server environments fully support VICIdial and Asterisk deployments. Core application behavior is identical, but service names differ: Apache runs as apache2 on Ubuntu (not httpd), and web files are owned by www-data rather than apache. Adjust all systemctl commands and chown targets to match. For new projects, AlmaLinux with a dedicated IP is the preferred baseline since ViciBox is built on that platform.
The Agent API (/agc/api.php) requires an active, authenticated agent session and controls live call actions – pause, resume, transfer, hangup, and disposition. The Non-Agent API (/vicidial/non_agent_api.php) works independently of any agent session and handles system-level operations: injecting leads, syncing CRM data, fetching campaign statistics, managing callbacks, and administering user accounts programmatically. Calling the Agent API without an active session always returns an auth failure – not a server error.
Create a User Group (Admin – User Groups), configure Allowed Reports to include only the target report (e.g. Agent Time Detail), and assign the supervisor’s account to that group. Set User Level to 7 or 8 and View Reports = 1, then set all other admin flags – Modify Users, Load Leads, Modify Campaigns, Delete Users – to 0. This grants precise report visibility without exposing any administrative functionality.
A blank page after authentication almost always points to one of three causes: incorrect file ownership on the custom theme directory (fix with chown -R apache:apache for AlmaLinux, or chown -R www-data:www-data for Ubuntu); a PHP error being suppressed by error_reporting settings (check /var/log/httpd/error_log or /var/log/apache2/error.log); or a misconfigured database connection because the theme’s config file references incorrect credentials or hostname
Conclusion
Troubleshooting a custom web UI Asterisk dialer layer by layer – from web server through database to API and permissions – dramatically shortens resolution time and eliminates the guesswork that turns minor configuration issues into extended outages. The five-step framework in this guide addresses the root causes behind the majority of failures reported on production contact center deployments: service failures, credential mismatches, API authentication errors, misconfigured user permissions, and theme path conflicts.
Carry these principles forward: test API endpoints independently before suspecting application code; manage all report access through User Groups rather than individual user settings; document your ViciBox and SVN versions before any theme build or upgrade; and treat file ownership on the custom theme directory as a first-check item after any server migration or redeployment.
If your team is planning a new custom VICIdial theme, requires a CRM integration built on the Non-Agent API, needs a custom reporting module, or is dealing with a persistent issue that these steps have not resolved – the engineering team at KingAsterisk is ready to assist. Reach out to evaluate current theme options before committing to a deployment.